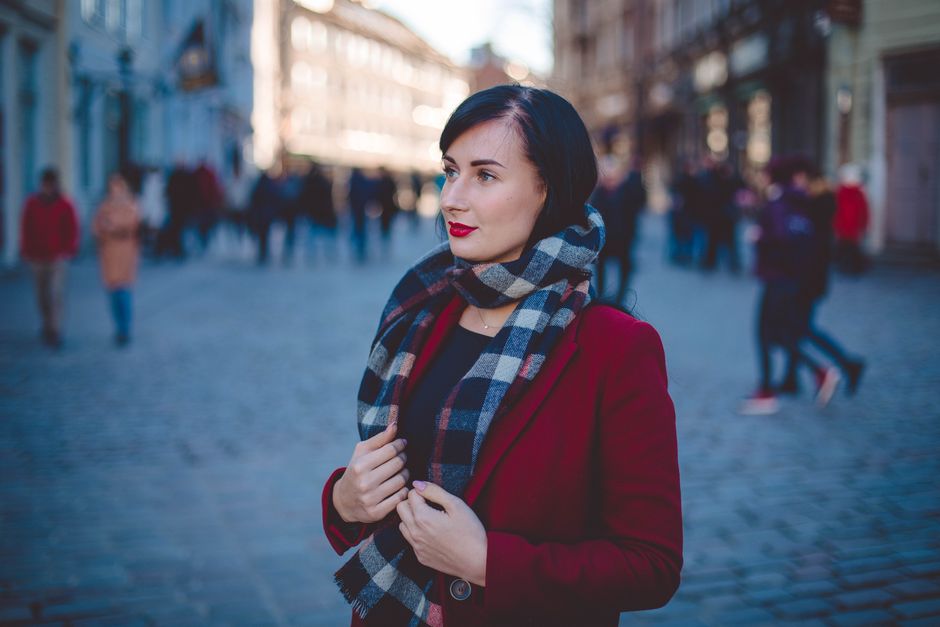
The coat looks fine. The scarf does not. It is either swallowing your neckline, falling loose in the wind, or creating a thick lump under your chin.
The fix is rarely a new wardrobe. It usually comes down to matching the scarf shape, knot, and layer placement to the coat underneath. A short jacket needs a different wrap from a long tailored coat. A thick scarf needs open space. A slim scarf needs a little structure.
How to Choose a Scarf Shape for Winter Layers
The most useful winter scarf styles begin with proportion. A scarf is not just a warm strip of fabric. It creates a second line around the face and chest, so its width and length change the apparent shape of the whole outfit.
Match the length to the coat
A scarf around 150 to 180 centimetres long works for most everyday wraps. It gives enough fabric for one loop without leaving long ends near the knees. Choose a longer scarf, around 190 to 220 centimetres, when you want a loose drape over a simple coat. The extra length creates vertical lines and can make a bulky winter outfit look taller.
Short scarves work best with cropped jackets and high collars. They keep the upper half of the outfit neat. A long scarf hanging over a short jacket can make the torso look crowded.
Use width to control volume
A width of 25 to 35 centimetres is the easiest range for daily wear. It covers the neck without taking over the shoulders. Scarves wider than 40 centimetres create a shawl effect, which looks intentional over a slim coat but can overwhelm a padded jacket.
Best starting point: choose a medium-width scarf, fold it once lengthwise, and test it with your warmest coat. If the folded edge reaches from your chin to your collarbone, the proportion is usually right.
Which Scarf Wrap Works With Each Coat Shape?

The clearest way to choose a scarf style is to look at the coat opening first. The scarf should fill a gap, frame a collar, or add a clean vertical line. It should not compete with the coat’s main shape.
| Coat shape | Best scarf action |
|---|---|
| Short jacket | One loose loop with short ends |
| Open tailored coat | Long drape or soft European loop |
| High-neck coat | Flat shoulder wrap |
| Belted coat | Single shoulder drape |
| Padded coat | Compact neck wrap |
For open coats, create a clean centre line
With an open coat, let the scarf sit inside the lapels instead of wrapping it tightly around the neck. A loose loop or simple drape gives the eye one long line from the face toward the hem. Keep both ends close in length so the outfit looks deliberate.
For closed coats, keep the scarf compact
When the coat is zipped or buttoned to the chin, use one close loop or a short knot. Push the scarf slightly to one side rather than building a thick mound at the centre. The winning approach for a high-neck coat is restraint: enough fabric to block wind, but no extra layers that press against the face.
Clear verdict: open coats look best with length, while closed coats look best with control. That single rule solves many awkward winter combinations.
Four Scarf Knots That Hold Their Shape
Most scarf knots fail because they are either too loose to stay put or too tight to look relaxed. These four methods cover everyday commuting, windy walks, dressier outfits, and layered weekend looks.
- The single loop: Place the scarf around the back of your neck with both ends in front. Pull one end through the loop loosely, then adjust the loop to sit just below the chin. This is the fastest option for a short jacket and works best when the ends finish near the lower ribs.
- The European loop: Fold the scarf in half, place the folded end at one shoulder, and pull the loose ends through the fold on the opposite side. Tighten gently. The knot stays close to the neck and creates an even, tidy shape. It is the best choice for wind because the folded section locks the scarf in place.
- The loose front knot: Drape the scarf around the neck, cross the ends once, and bring them forward without tightening. This leaves a soft opening near the collarbone. Use it with a tailored coat when you want warmth without a wrapped-up appearance.
- The shoulder throw: Place the scarf around the back of the neck, leave one end longer, and throw that end over the opposite shoulder. Keep the shorter end in front. This gives a long diagonal line and works well with a belted coat, but it needs a smooth scarf surface to stay in place.
Start with the knot that solves the weather problem first. Use the European loop for wind, the loose front knot for indoor-to-outdoor dressing, and the shoulder throw when the coat silhouette matters more than maximum neck coverage.
Why Winter Scarves Look Bulky and How to Fix It
Bulk usually comes from stacking volume in the wrong place. A thick sweater, a high collar, and a wide scarf can all sit around the same two inches of the body. The result feels tight and makes the head look smaller. The scarf itself may be attractive, but the layers have no breathing room.
Separate the warmest layers
Choose one main volume source near the neck. If the sweater has a raised collar, keep the scarf flat over the shoulders or use a narrow loop. If the scarf is thick, wear a smoother neckline underneath. This creates a visible gap between the layers and lets each piece keep its shape.
Another useful fix is to move the scarf off-centre. A centre knot builds width directly beneath the face. Shifting the knot two or three centimetres to one side creates an angled line and reduces the blocky effect.
Control the ends
Long ends can make an outfit look untidy when they stop at different points across the coat. Aim for a difference of no more than 10 to 15 centimetres unless the uneven length is clearly intentional. Tuck the ends inside an open coat for a cleaner look, or let both ends hang outside when the coat has a simple front.
Use contrast with care
A scarf with a strong pattern attracts attention to the face and upper chest. That can be useful when the coat is plain. It can also create visual noise when the sweater, coat, and scarf all have different textures. The most reliable combination is one statement texture with two quieter surfaces.
Best correction for most outfits: remove one loop before changing the scarf. Many people keep wrapping because they want more warmth, but a flatter layer often blocks wind just as well and looks far cleaner.
When Not to Use a Wrapped Scarf

A wrapped scarf is not always the right answer. For a crowded neckline, the better move is often a shoulder drape, a collar tuck, or no visible wrap at all. Warmth matters, but so does movement around the face and shoulders.
Skip the tight wrap with a high collar
If a coat already covers the neck, adding a tight scarf loop can make the top half feel restrictive. Choose a flat shoulder layer instead. It adds insulation across the chest while leaving the throat area open enough for comfortable movement.
Skip the long drape in heavy wind
Long scarf ends look elegant in calm weather but can catch on bags, bike handles, and door hardware. On a windy day, use a compact knot with both ends tucked inside the coat. The practical winner is the style that stays put when you walk quickly.
Skip matching every layer
A scarf does not need to repeat the coat, sweater, or trousers exactly. Matching everything can flatten the outfit into one block of colour. Instead, repeat one small detail, such as a warm tone or a soft neutral, and let the scarf provide contrast.
For a polished winter outfit, the strongest choice is often the least complicated one: a simple coat, one clear scarf shape, and enough open space for the face. More wrapping is not automatically more stylish or warmer.
Winter Scarf Questions, Answered by Outfit Problem
How should a scarf sit with a hood?
Keep the scarf inside the hood opening. A compact loop around the neck prevents the hood from sitting away from the head. Avoid a wide shoulder wrap because it can push the hood forward and create extra weight behind the neck.
What is the easiest scarf style for a busy morning?
The single loop is the best default. It takes seconds, works with most coat shapes, and can be tightened outside or loosened indoors. Set the ends at a similar length, then make one small adjustment at the side instead of rebuilding the knot.
